
by Jason Clark
There are two ways of achieving this, either using the Graph API or using the PnP Graph feature. I will outline both methods here.
Graph API
Firstly navigate to your project folder and create your solution folder
md SPFx_GraphAPI
change the directory to that folder and create the skeleton solution
cd SPFx_GraphAPI
yo @microsoft/sharepoint

Open the Package-Solution file from Config folder within the solution and add the following code to the solution section.
 "webApiPermissionRequests": [
      {
        "resource": "Microsoft Graph",
        "scope": "User.Read.All"
      },
      {
        "resource": "Microsoft Graph",
        "scope": "GroupMember.Read.All"
      },
      {
        "resource": "Microsoft Graph",
        "scope": "Group.Read.All"
      }
    ]
The full section code should look like this.
 "solution": {
    "name": "my-first-graph-client-side-solution",
    "id": "074a6c4e-9aa0-451e-95a2-fd8e2f800464",
    "version": "1.0.0.0",
    "includeClientSideAssets": true,
    "skipFeatureDeployment": true,
    "isDomainIsolated": false,
    "developer": {
      "name": "",
      "websiteUrl": "",
      "privacyUrl": "",
      "termsOfUseUrl": "",
      "mpnId": "Undefined-1.18.0"
    },
    "metadata": {
      "shortDescription": {
        "default": "MyFirstGraph description"
      },
      "longDescription": {
        "default": "MyFirstGraph description"
      },
      "screenshotPaths": [],
      "videoUrl": "",
      "categories": []
    },
    "features": [
      {
        "title": "my-first-graph Feature",
        "description": "The feature that activates elements of the my-first-graph solution.",
        "id": "8996ce8b-0cfb-44e1-afd2-9c4e567c6c46",
        "version": "1.0.0.0"
      }
    ],
    "webApiPermissionRequests": [
      {
        "resource": "Microsoft Graph",
        "scope": "User.Read.All"
      },
      {
        "resource": "Microsoft Graph",
        "scope": "GroupMember.Read.All"
      },
      {
        "resource": "Microsoft Graph",
        "scope": "Group.Read.All"
      }
    ]
  },
Open the GraphAPI.ts file within the SRC > WebParts > GraphAPI
Add this line to the imports section.
import { MSGraphClientV3 } from '@microsoft/sp-http';
In the Render Class function add the following line to the innerHTML code
<div id="spListContainer" />
Add this code to the end of the function.
 let groupflag = await this.getPermissions();
        if(groupflag){
          // do something if user is in group
        }
Create the following function within the Class to check a Graph Group, adding in the Group ID from Entra in the [Group ID] part of the const members : any = await graphClient.api(“/groups/[Group ID]/members”).top(999).get(); line.
 private async getPermissions(): Promise<boolean> {
    let isMember = false;
    let html : string = "";
    let graphClient: MSGraphClientV3 = (await    this.context.msGraphClientFactory.getClient("3"));//.api("/me").get();

    try {

      graphClient = await this.context.msGraphClientFactory.getClient("3");
      const members : any = await graphClient.api("/groups/[Group ID]/members").top(999).get();
      const myDetails = await graphClient.api("/me").get();

      console.log("group members",members);
      console.log((await myDetails).id);
      console.log("total members",members.value.length);

      for (let x = 0; x < members.value.length; x++) {
        console.log("member id",members.value[x].id);
        let groupMemberID = members.value[x].id;
        if (groupMemberID === (await myDetails).id) {
          isMember = true;
          html = `<p>User is in the group</p>`;
          break;
        }
      }

      const listContainer: Element | null = this.domElement.querySelector('#spListContainer');
      if(listContainer){listContainer.innerHTML = html;}

    } catch (err) {
      // add error message code
    }
    return isMember;
  }
Change the onInit Function to be the following.
 public onInit(): Promise<void> {
    return super.onInit().then(_ => {
      this._getEnvironmentMessage().then(message => {
        this._environmentMessage = message;
      });
    });
  }
Build, Bundle and Package the solution, by running these NPM commands
Gulp BuildGulp Bundle
Gulp Package-Solution
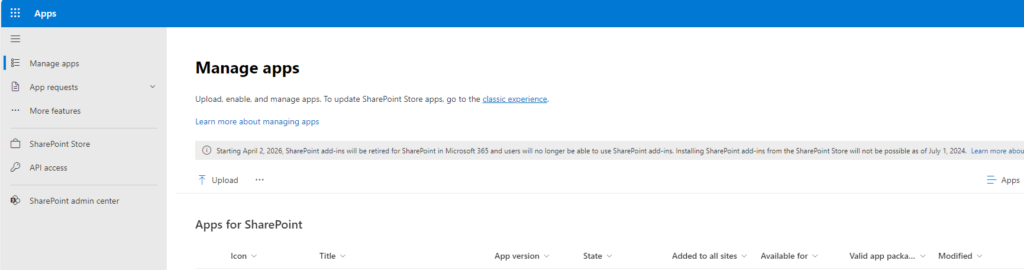
Navigate to your tenant App Catalog site, go to the SharePoint Admin site, click on Apps.Welcome to WordPress. This is your first post. Edit or delete it, then start writing!

Under the local project folder within the File Explorer navigate to the current solution folder and within it the SharePoint > Solution folder, grab the .sppkg file and upload to the App Catalog site.
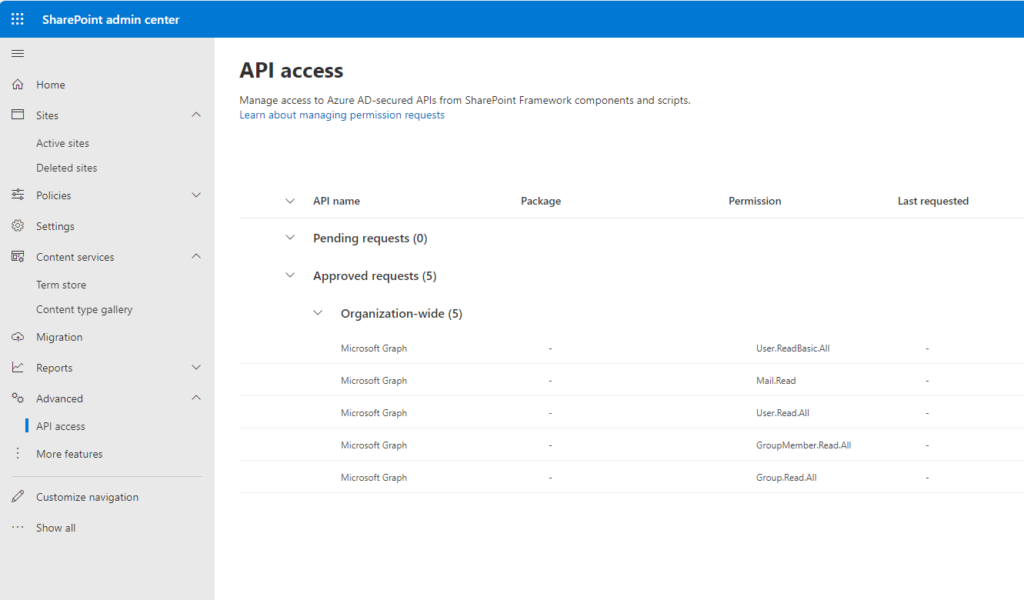
Still within the SharePoint Admin centre go to the API Access and approve any Graph pending requests.
Now you can run the app in the local workbench, running the following command in a terminal window.
Gulp Serve --nobrowser
PnP Graph
Same as before, navigate to your project folder and create your solution folder
md SPFx_PnPGraph
change the directory to that folder and create the skeleton solution
cd SPFx_PnPGraph
yo @microsoft/sharepoint

once the solution has been frameworked, then open in VIsual Studio Code
Code .
Open the Package Solution file (as before) and add the Graph scopes to the Solution section.
 "webApiPermissionRequests": [
      {
        "resource": "Microsoft Graph",
        "scope": "User.Read.All"
      },
      {
        "resource": "Microsoft Graph",
        "scope": "GroupMember.Read.All"
      },
      {
        "resource": "Microsoft Graph",
        "scope": "Group.Read.All"
      }
    ]
The full section code should look like this.
 "solution": {
    "name": "my-first-graph-client-side-solution",
    "id": "074a6c4e-9aa0-451e-95a2-fd8e2f800464",
    "version": "1.0.0.0",
    "includeClientSideAssets": true,
    "skipFeatureDeployment": true,
    "isDomainIsolated": false,
    "developer": {
      "name": "",
      "websiteUrl": "",
      "privacyUrl": "",
      "termsOfUseUrl": "",
      "mpnId": "Undefined-1.18.0"
    },
    "metadata": {
      "shortDescription": {
        "default": "MyFirstGraph description"
      },
      "longDescription": {
        "default": "MyFirstGraph description"
      },
      "screenshotPaths": [],
      "videoUrl": "",
      "categories": []
    },
    "features": [
      {
        "title": "my-first-graph Feature",
        "description": "The feature that activates elements of the my-first-graph solution.",
        "id": "8996ce8b-0cfb-44e1-afd2-9c4e567c6c46",
        "version": "1.0.0.0"
      }
    ],
    "webApiPermissionRequests": [
      {
        "resource": "Microsoft Graph",
        "scope": "User.Read.All"
      },
      {
        "resource": "Microsoft Graph",
        "scope": "GroupMember.Read.All"
      },
      {
        "resource": "Microsoft Graph",
        "scope": "Group.Read.All"
      }
    ]
  },
Add the following Imports to the Import section of the PnPGraph.ts file.
import { graphfi, SPFx as graphSPFx, SPFxToken } from "@pnp/graph";
import "@pnp/graph/groups";
import "@pnp/graph/members";
import "@pnp/graph/users";
Open a Terminal window and install the PnP Graph extension for the project.
npm i @pnp/graph --save
In the Render Class function add the following line to the innerHTML code
<div id="spListContainer" />
Add this code to the end of the function.
 let groupflag = await this.getPermissions();
        if(groupflag){
          // do something if user is in group
        }
Create the following function within the Class to check a Graph Group, adding in the Group ID from Entra in the [Group ID] part.
 private async getPermissions(): Promise<boolean> {
    let isMember = false;
    let html : string = "";
    const graph = graphfi().using(graphSPFx(this.context), SPFxToken(this.context));
    let members : any=[];
    try {

      members = graph.groups.getById("[Group ID]").expand("members")().then(async (group: { members: any; })=>{
        const myDetails = graph.me();

        console.log("group",group.members);
        console.log((await myDetails).id);
        console.log(members.length);

        for (let x = 0; x < members.length; x++) {
          // do something with the members array.
          if(members[x].id === myDetails.id){
             isMember = true;
             html = `<p>User is in the group</p>`;
          }
        }
      });

      const listContainer: Element | null = this.domElement.querySelector('#spListContainer');
      if(listContainer){listContainer.innerHTML = html;}

    } catch (err) {
      // do something with the error
    }
    return isMember;
  }
Update the onInit function to be the following.
 public onInit(): Promise<void> {
    return super.onInit().then(_ => {
      this._getEnvironmentMessage().then(message => {
        this._environmentMessage = message;
      });
    });
  }
Build, Bundle and Package the solution, by running these NPM commands
Gulp Build
Gulp Bundle
Gulp Package-Solution
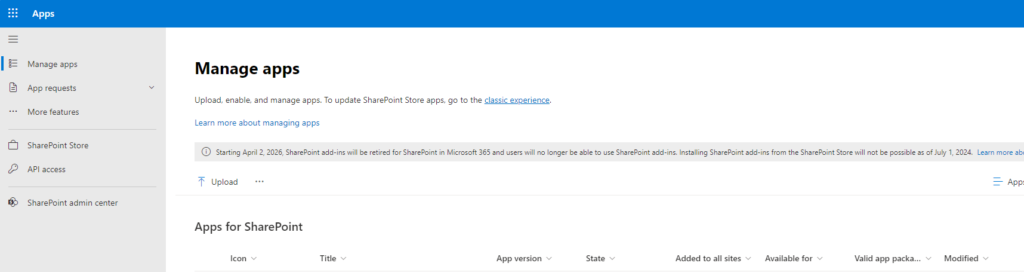
Navigate to your tenant App Catalog site, go to the SharePoint Admin site, click on Apps.
Under the local project folder within the File Explorer navigate to the current solution folder and within the SharePoint > Solution folder, grab the .sppkg file and upload it to the App Catalog site.
Now you can run the app in the local workbench, by running the following command in a terminal window.
Gulp Serve --nobrowser
 using WordPress and
One response
Hi, this is a comment.
To get started with moderating, editing, and deleting comments, please visit the Comments screen in the dashboard.
Commenter avatars come from Gravatar.